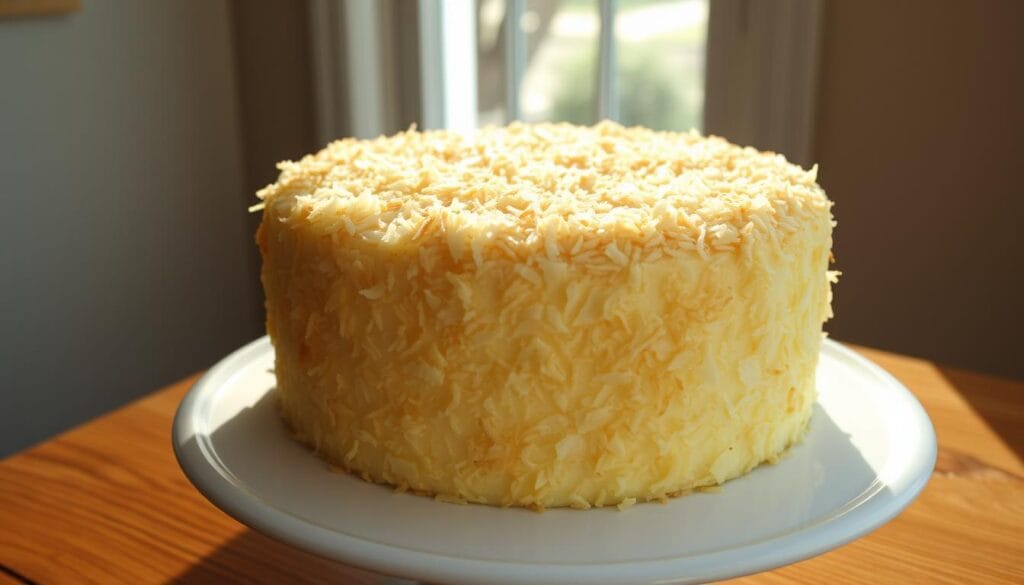
Explore the charm of an old fashioned coconut cake, a treasured classic dessert. It brings warmth and nostalgia to any event. This coconut cake recipe turns simple ingredients into a stunning centerpiece, delighting everyone.
Picture a cake so moist and flavorful, it feels like stepping back into Southern kitchens of the past. With its delicate layers, rich frosting, and plenty of coconut, it’s more than a dessert. It’s a culinary tradition ready to be celebrated in your kitchen.
Table of Contents
The Heritage Behind Old Fashioned Coconut Cake
Vintage cake traditions are deeply rooted in Southern kitchens. Grandma’s coconut cake is more than a sweet treat. It tells stories of family, resilience, and culinary artistry passed down through generations.
Southern Baking Traditions
Southern coconut cake comes from a rich cultural background. Cooking was seen as an act of love and survival. Before the Civil War, coconuts were rare, making these cakes special occasion treats.
Legacy of Family Recipes
The journey of coconut cake is a remarkable culinary history. Early cookbooks show interesting preparation methods:
- Roasting whole coconuts by hand
- Cracking and grating fresh coconut meat
- Mixing ingredients without modern conveniences
“A recipe is a story that ends with a meal.” – Unknown
Historical Recipe Evolution
| Era | Baking Characteristics | Notable Cookbook |
|---|---|---|
| 1830-1880 | Hand-beaten egg whites for leavening | Malinda Russell’s Cookbook (1866) |
| 1881 | Whole coconut preparation | Abby Fisher’s Cookbook |
| 1904 | Community cooking influences | Minnie Fox’s Bluegrass Cookbook |
Your family’s vintage cake recipe holds deep cultural significance. It connects you to generations of skilled Southern bakers. They turned simple ingredients into extraordinary culinary experiences.
Essential Ingredients for Perfect Coconut Cake
To make a great homemade coconut cake, you need the right ingredients. These ingredients make your cake moist and full of flavor. They turn simple baking into a true culinary art.
The best coconut cake starts with top-notch ingredients. Here’s what you’ll need:
- Cake flour (360 grams) for a tender crumb
- Unsalted butter (339 grams) at room temperature
- Granulated sugar (396 grams)
- Large eggs (6 total)
- Vanilla extract (2 teaspoons)
- Cream of coconut (213 grams)
- Baking powder and baking soda
- Sweetened shredded coconut (170 grams)
Pro tip: Always use fresh, high-quality ingredients to ensure your homemade coconut cake delivers maximum flavor and texture.
“The secret to an outstanding coconut cake lies in the quality and balance of its ingredients.” – Baking Experts
When picking ingredients for your coconut cake, focus on a few key things:
- Choose room temperature butter for smoother mixing
- Use fresh eggs for better structure
- Opt for pure vanilla extract
- Select high-quality shredded coconut
Your ingredients will come together to make a dessert that’s both delicious and impressive. It will wow your family and friends with its rich, tropical taste and perfect texture.
The Secret to Moist Cake Layers
Making a moist homemade coconut cake is more than just a recipe. It’s an art that needs precise techniques and the right ingredients. This ensures your moist coconut dessert is perfect every time.
Room Temperature Ingredients: The Foundation of Moisture
Your baking success begins with the temperature of your ingredients. Ingredients at room temperature mix better, creating a batter that holds moisture. For your coconut cake, take butter, eggs, and milk out of the fridge 30-45 minutes before you start.
- Butter should be soft but not melted
- Eggs blend more evenly at room temperature
- Coconut milk incorporates better when slightly warm
Mastering Mixing Techniques
Proper mixing is key to avoiding dry, dense cake layers. Mix just until the ingredients are combined. Overmixing can make your cake heavy and dry.
“Gentle mixing is the secret to tender, cloud-like cake layers.” – Baking Experts
Moisture-Locking Strategies
Take your homemade coconut cake to the next level with moisture-lock methods. Here are some professional tips:
- Brush cake layers with coconut syrup
- Use oil alongside butter for added moisture
- Add cornstarch to soften cake texture
Your coconut cake will stay moist for days. It will be just as delicious on day three as it is when it’s fresh.
Mastering the Seven-Minute Frosting
Making the perfect coconut buttercream frosting is like an art. The seven-minute frosting is a classic that turns a simple cake into a showstopper. It makes your cake light and fluffy, like a marshmallow.

- 1 1/2 cups granulated sugar
- 1/4 cup water
- 4 large egg whites
- 1/4 teaspoon cream of tartar
- 1 teaspoon vanilla extract
To get this frosting right, you need to control the temperature and technique. Use a double boiler or a heat-safe bowl over simmering water. Whip the egg whites until they’re soft and fluffy, like a cloud.
“Patience is the secret ingredient in seven-minute frosting” – Baking Experts
Cooking time is very important. Whisk for exactly seven minutes to mix sugar syrup and egg whites into a glossy, spreadable frosting. Look for these signs of perfect frosting:
- Peaks should stand up firmly
- Texture should be smooth and shiny
- Frosting should hold its shape when spread
To get that old fashioned coconut cake feel, spread this frosting generously on each layer. Add toasted coconut between layers for extra flavor. It’s like stepping into grandma’s kitchen.
Pro tip: Work quickly when applying the frosting, as it sets rapidly and can become difficult to spread.
Choosing and Preparing Coconut
Choosing the right coconut is key for a tasty homemade coconut cake. The type of coconut you pick can change the cake’s flavor and texture.
Fresh vs. Sweetened Coconut Varieties
You’ll find two main types of coconut for your cake: fresh and sweetened. Each has its own special qualities for your baking journey.
| Coconut Type | Flavor Profile | Best Used For |
|---|---|---|
| Fresh Coconut | Intense, natural flavor | Premium homemade coconut cake |
| Sweetened Coconut | Mild, sugary taste | Quick and convenient baking |
Toasting Techniques
Toasting coconut adds a deep, nutty taste to your cake. Here’s how to do it:
- Spread coconut evenly on a baking sheet
- Bake at 350°F for 5-7 minutes
- Stir occasionally to prevent burning
- Watch carefully until golden brown
Proper Storage Methods
Keep your coconut fresh with these storage tips:
- Refrigerate opened coconut in an airtight container
- Freeze for extended storage up to 6 months
- Thaw frozen coconut at room temperature for 10-15 minutes
“The secret to an exceptional coconut cake lies in the quality of your coconut.” – Baking Professionals
Pro tip: For the most authentic flavor, consider using fresh frozen coconut brands like Goya or Bird’s Eye in your coconut cake recipe.
Step-by-Step Baking Process

Making the perfect homemade coconut cake needs precision and love. Your coconut cake recipe starts with careful preparation and thoughtful technique. Let’s go through the key steps to make a dessert that will wow your family and friends.
Preparation Essentials
- Gather all ingredients at room temperature
- Preheat oven to 325°F
- Prepare three 9-inch round cake pans with parchment paper
Begin by creaming the butter and sugar until it’s light and fluffy. This step is crucial for a tender coconut cake. Make sure to separate your eggs carefully. Egg whites help make the cake airy.
Mixing the Batter
- Cream 1 cup unsalted butter with 2 cups granulated sugar
- Add egg yolks one at a time, mixing thoroughly
- Alternately add dry ingredients and milk
- Fold in 1 cup sweetened flaked coconut
The secret to a moist homemade coconut cake is not overmixing. Gently fold ingredients to keep the batter’s delicate structure.
| Ingredient | Measurement | Purpose |
|---|---|---|
| Cake Flour | 3 cups | Provides soft texture |
| Baking Powder | 2 teaspoons | Helps cake rise |
| Vanilla Extract | 2 teaspoons | Enhances flavor |
“Baking is love made edible” – Unknown
Bake your layers for 18-20 minutes, watching carefully to prevent over-browning. Cool completely before frosting for the best coconut cake experience.
Traditional Frosting Techniques
Making the perfect coconut layer cake needs you to master traditional frosting techniques. Your coconut buttercream frosting is the cake’s crowning glory. It turns a simple dessert into a culinary masterpiece.
Layer Assembly Tips
Assembling the coconut layer cake requires precision and patience. Begin by leveling your cake layers with a serrated knife. This ensures even surfaces. Place the first layer on a rotating cake stand for easy handling.
- Use a cardboard round underneath each layer for stability
- Apply a thin layer of coconut buttercream frosting between each cake layer
- Gently press layers to create a uniform stack
- Refrigerate cake for 15 minutes to set layers
Achieving the Perfect Coating
The crumb coat is key for a flawless finish. It’s a thin initial layer of frosting that seals in crumbs. It also creates a smooth base for the final decoration.
| Frosting Component | Quantity | Purpose |
|---|---|---|
| Cream Cheese | 16 oz | Creamy base |
| Powdered Sugar | 3 cups | Sweetness and structure |
| Heavy Whipping Cream | 2 cups | Lightness and volume |
Decorative Finishing Touches
Turn your coconut layer cake into a visual masterpiece. Coat the exterior with grated coconut. Press frozen, thawed coconut gently around the sides and top for an elegant look.
Pro tip: Toast some coconut flakes for added texture and depth of flavor in your final presentation.
Your coconut buttercream frosting should be smooth and spreadable. It should hold its shape well. Refrigerate the cake for 30 minutes before serving. This allows the frosting to set perfectly.
Storage and Serving Recommendations
Keeping your classic coconut dessert fresh is key. Your old fashioned coconut cake needs special care. This ensures it stays delicious and moist.
- Room Temperature: Store for up to 2 days in an airtight container
- Refrigeration: Keeps fresh for up to 1 week
- Freezing: Can be preserved for up to 3 months
“A well-stored cake is a delicious cake!” – Baking Experts
For cakes stored in the fridge, take them out 30-45 minutes before serving. This lets them warm up. It makes the cake soft again and brings out the flavors.
Here are some tips for serving your coconut cake:
- Use a sharp, clean knife for precise slices
- Wipe the knife between cuts for clean edges
- Serve on chilled plates for an elegant presentation
| Storage Method | Duration | Recommended Conditions |
|---|---|---|
| Room Temperature | Up to 2 days | Covered container |
| Refrigerator | Up to 1 week | Airtight container |
| Freezer | Up to 3 months | Wrapped in plastic wrap |
Pro tip: When freezing, wrap your cake in plastic wrap and then foil. This stops freezer burn. To thaw, let it thaw slowly in the fridge overnight.
Troubleshooting Common Issues
Even the most experienced bakers face challenges when making a perfect coconut cake. Knowing common problems can help you succeed in your baking journey.
Let’s look at the most common problems you might face while making your homemade coconut cake:
- Dry Cake Layers: Often caused by overmixing batter or overbaking
- Runny Frosting: Typically results from incorrect sugar-to-liquid ratio
- Coconut Not Adhering: Can happen when cake surface is too smooth
Preventing Dry Cake Layers
To avoid dry layers in your coconut cake recipe, follow these tips:
- Measure ingredients precisely
- Use room temperature ingredients
- Do not overmix the batter
- Check cake doneness with a toothpick
“The secret to a moist cake is in the details of preparation.” – Baking Professionals
Frosting and Coconut Application Solutions
| Issue | Solution |
|---|---|
| Runny Frosting | Add powdered sugar gradually, chill before applying |
| Coconut Not Sticking | Brush cake with simple syrup before coating |
| Uneven Coating | Press coconut gently by hand after sprinkling |
Remember, practice makes perfect in your homemade coconut cake adventure. Each challenge is an opportunity to refine your baking skills!
Variations and Modern Twists
Your classic coconut cake recipe doesn’t have to stay the same. Creative bakers are making this beloved southern coconut cake exciting again. They mix new flavors and techniques that keep the traditional taste but add something new.
- Tropical Fruit Infusions
- Pineapple coconut cake
- Mango-coconut layer cake
- Passion fruit coconut filling
- Flavor Enhancements
- Rum-soaked coconut layers
- Lime zest incorporation
- Almond extract accent
Looking for something different in southern coconut cake? Try these new ways to make it:
| Variation Type | Key Modification | Flavor Profile |
|---|---|---|
| Chocolate Coconut | Cocoa powder in batter | Rich, decadent |
| Cream Cheese Fusion | Cream cheese frosting | Tangy, smooth |
| Nutty Twist | Toasted macadamia nuts | Crunchy, buttery |
Pro tip: Keep the key things that make coconut cake great – it should be moist, have good texture, and taste like coconut.
“Innovation respects tradition while creating something wonderfully new.” – Culinary Wisdom
Remember, each new twist should still honor the cake’s true taste. Whether you add fruit, try new frostings, or mix in unexpected ingredients, aim to improve the classic coconut cake, not change it too much.
Conclusion
Your journey through classic coconut desserts ends with a celebration of culinary heritage. The old fashioned coconut cake is more than a sweet treat. It connects us to family traditions and Southern baking wisdom passed down through generations.
Making this timeless dessert requires passion, precision, and respect for ingredients. From measuring 2 1/4 cups of flour to folding in 1 cup of sweetened shredded coconut, each step is a story of love and dedication. The mix of 3 large eggs, 1 cup of coconut milk, and precise leavening agents turns simple ingredients into a memorable cake.
Serving this classic coconut dessert is not just about sharing a cake. It’s about sharing a piece of culinary history. The rich, moist layers topped with creamy frosting and 2 cups of shredded coconut bring comfort and joy. It’s perfect for any occasion, creating memories that warm the heart and delight the senses.
Your baking adventure doesn’t end here. Every time you make this beloved dessert, you join a tradition that celebrates home baking and the joy of sharing moments with others.